Understanding the Canvas
Understanding the Workflow Canvas
Section titled “Understanding the Workflow Canvas”The Workflow Canvas is the heart of FeedFlux Desktop. It’s a visual interface where you design automation workflows by placing and connecting modules.
Canvas Overview
Section titled “Canvas Overview”
| Element | Description |
|---|---|
| Toolbar | Save, run, stop workflows and control canvas view |
| Modules Panel | List of all available automation modules to drag onto canvas |
| Canvas Area | The main workspace where you build your workflow |
| Nodes | Individual modules placed on the canvas |
| Connections | Lines linking nodes to define execution flow |
| Settings Panel | Configuration options for the selected node |
Canvas Navigation
Section titled “Canvas Navigation”| Action | How To |
|---|---|
| Pan/Move | Click and drag on empty canvas area |
| Zoom In/Out | Mouse scroll wheel, or use zoom buttons |
| Fit to View | Click “Fit” button to see entire workflow |
| Select Node | Click on any node |
| Multi-Select | Hold Shift and click multiple nodes, or drag selection box |
| Delete Node | Select node and press Delete key |
Node Anatomy
Section titled “Node Anatomy”Each node on the canvas has these parts:
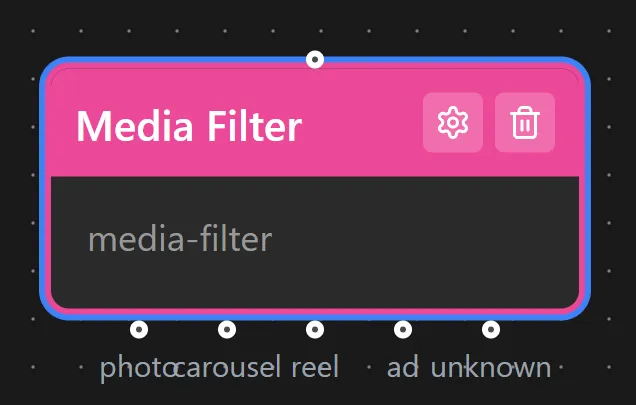
- Input Handle (top): Where connections from previous modules attach
- Output Handle (bottom): Where connections to next modules start
- Icon: Visual indicator of module type
- Module Name: The name of the module
How Workflows Execute
Section titled “How Workflows Execute”Workflows in FeedFlux are linear — modules execute in sequence, from the first module to the last. There are no branching or condition nodes on the canvas itself.